
System Boarding, Part I: Why and How
Some time ago I received a reader question about System Boarding for Power. At the time, my experience with a system board was limited to the most basic, bare bones, old school version of a system board, containing HIT strips, a few pinches, and maybe a few other holds in random spots. That setup, and many I’ve seen, are better suited toward a very monotonous form of power endurance training, or if you’re above the 5.12 or so level, it likely falls more into the area of local endurance. Even adding tons of weight on that style setup for what most would call a “strength” workout, and you'd have to do so many repetitions that skin would become a major issue, and the rep count would be way too high to be training true strength.
The other popular version of the system board is one that has a vertical series of the same pinches, the same crimps, the same pockets, and the same crimps. A climber would ladder up and down these holds in order to work a specific grip. Problem is, as you get stronger, you either have to add considerable weight, buy harder to use holds, or do more laps. Adding weight doesn't necessarily help you hold smaller edges, and can quickly erode technique. Buying new holds every time you progress would get expensive, and more laps is just training endurance.
In that previous post, I posited that a better way to system board for power would be to treat it more like bouldering, but on mirror-image symmetrical walls. Recently in our new Engine Room training space, with the help of Atomik Climbing Holds, I was able to put my theories to the test.
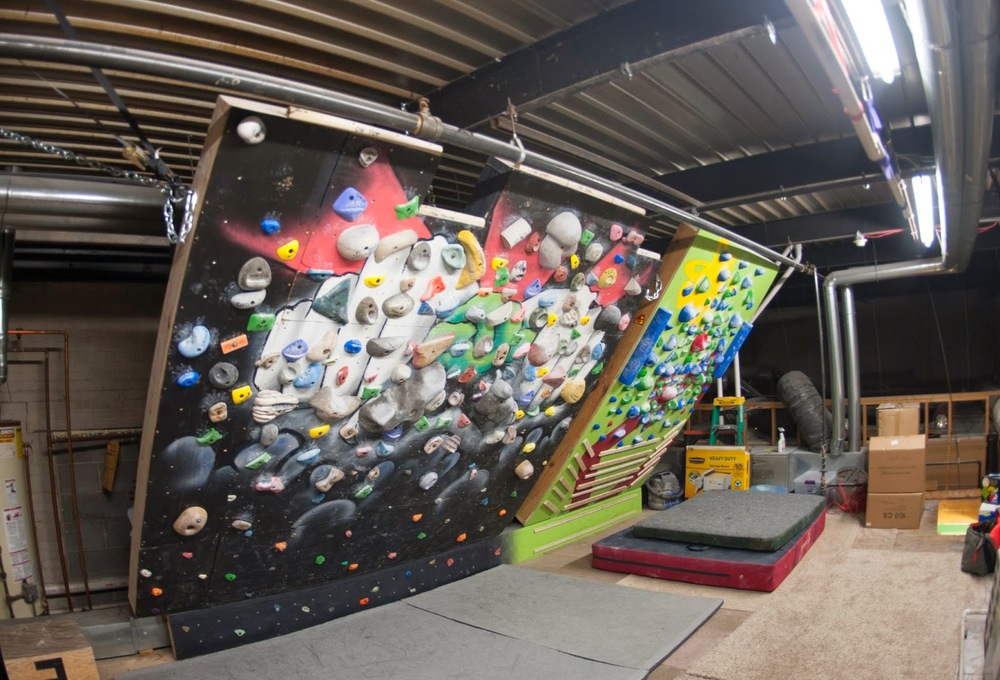
The Engine Room.
In this continuing series of posts about System Boards, I’ll discuss not only what, how, and why, but also how I went about choosing which holds to buy, how I decided on the hold layout, and a review of Atomik’s extensive line of system holds.

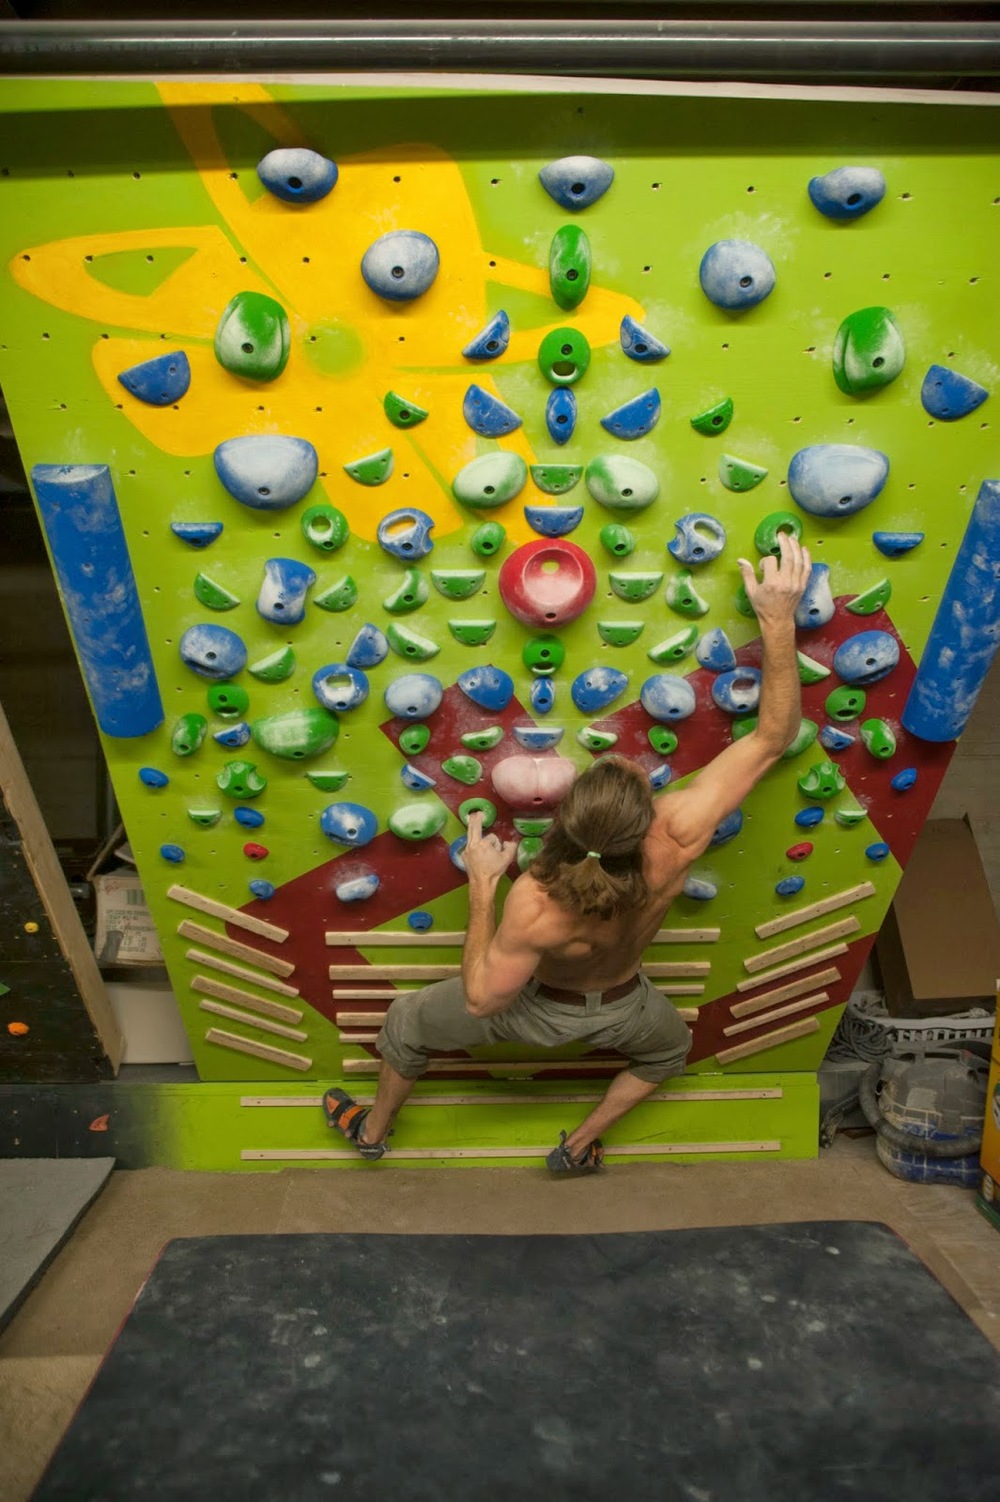
Jeff Kayse puttin in work.
Today, the why and the how.
We all know that bouldering is the best way to train real climbing power. While you can separate climbing power into its different components and maybe more effectively train those (think: campusing), there is no better substitute for doing hard moves than, well, simply doing hard moves.
The problem with using bouldering as a training tool is that it’s simply too difficult to measure and control. If you train in a commercial gym, you’ve likely experienced the frustration of problems being height dependant, or all of the hard problems are compression, or every hard move is a jump to a crimp, rather than the precision and tension you so desperately desire. Not to mention, the grading of boulder problems in most commercial gyms is at best inconsistent, leaving you often confounded as to whether or not you’ve improved. Frustrating.
I was there. Between the frequent changes to the boulders in the gym, the jumps at the end of every problem, and the (very) inconsistent grading that you’ll inevitably get within a group of setters, I was in need of a change. I needed a bouldering wall filled with moderate to bad handholds of all types and footholds that would require constant tension to avoid cutting feet. I wanted it short enough that no more than 3-4 moves would land you on a finishing hold, and preferably on an adjustable angle to mimic outdoor projects. Its configuration would have to remain static for long periods of time so that I could measure progress on the exact movements from previous seasons. I could simply have built a small bouldering wall, but I also wanted to be more systematic. I know from past experience that my right side is considerably weaker than my left. A short, fierce bouldering wall that is split down the center by it’s own mirror image seemed to be the best option.
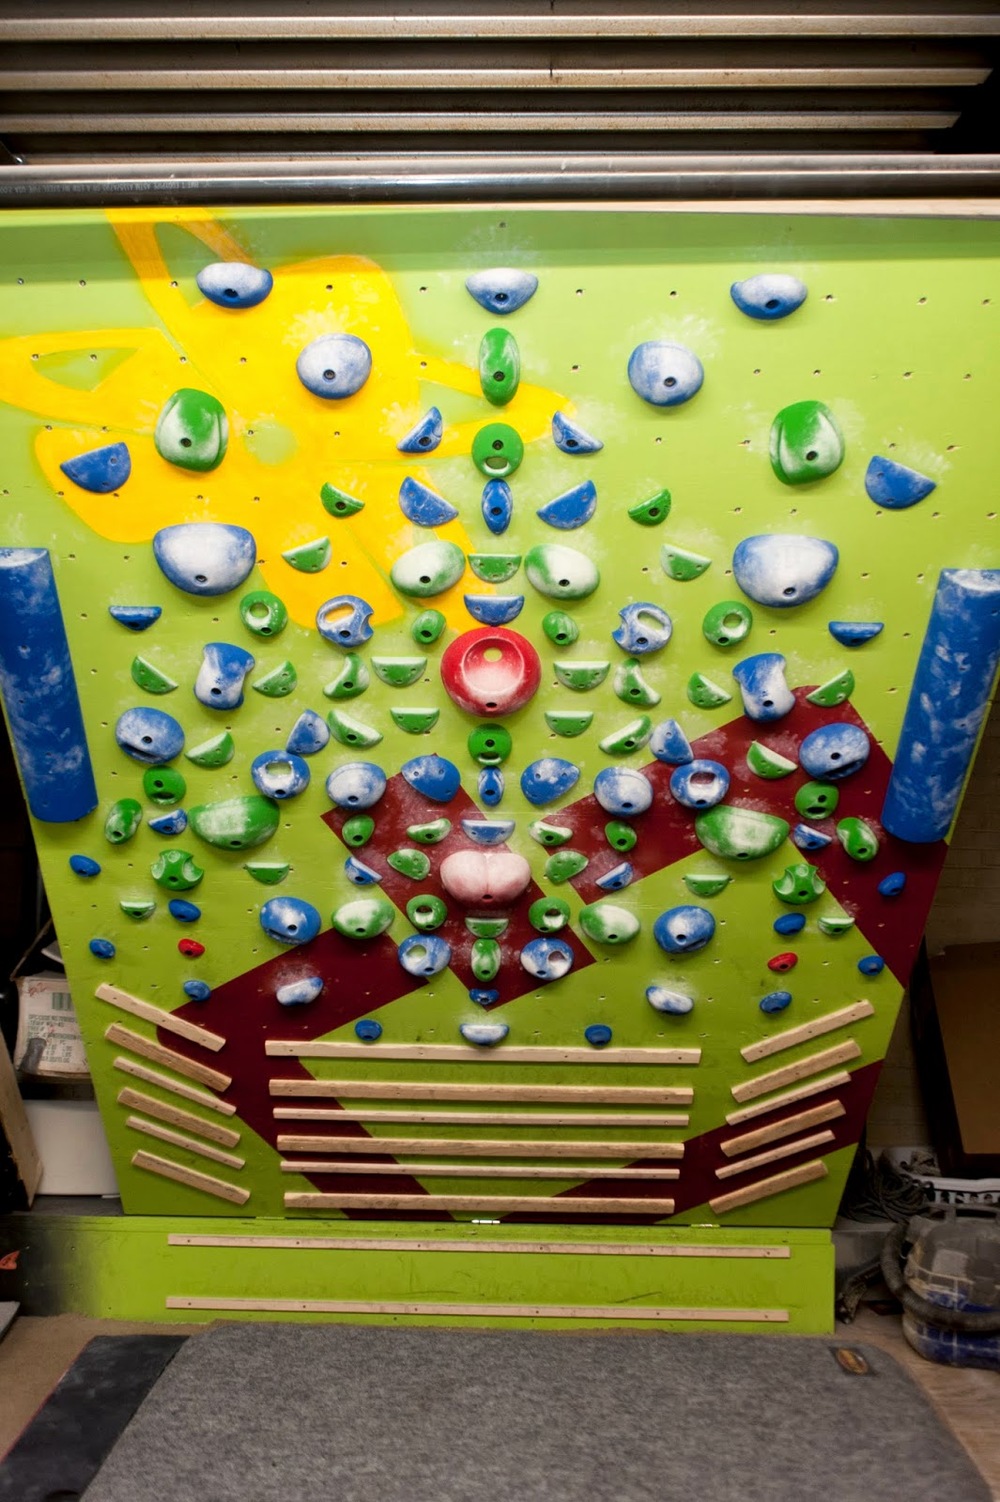
Enter my new favorite training tool: The System Board.
Jeff Kayse training pockets.
More than half of the climbing portion of our strength and power phases has moved to the system board. Progress from the workouts has become much easier to measure. My right side weakness has more clearly emerged, and I’m able to address it more effectively.
It’s so deceptively simple. You make up a hard boulder problem that targets a hold type or movement that is either giving you trouble or is specific to your project. You try that problem, rest, then try it's mirror image. Ideally, you'll be able to increase the difficulty of the problem by either using a worse foot or using a slightly worse hold to do a similar movement. With this kind of focused targeting, I've found that my power is drained quickly, and it's easier to see that it's draining because I've gotten very familiar with the minutae of the movements I'm trying, so a drop in the level of my balance, my pull, my coordination, or my core can signal the end of a session.
You're only limited by your imagination. I've come up with dozens of moves that I've yet to do and dozens of others that I can't yet fathom. For many seasons to come, this will be my go-to tool.
Up next: the What. I'll discuss the specifics of our board... dimensions, construction, and which holds I chose. Stay tuned!


A spectrum of exercises to train contact strength.