
Campusing, Part III: Plyometrics

**This is the third post in a series on campusing. If you haven't already, check out Part I and Part II.**
As far as I can tell, and I've looked pretty extensively, not many people who are campusing understand exactly what plyometrics are. More often than not, I see articles or videos labeled with "plyometrics" that contain little or no actual plyometric work.
This post is going to be short, because frankly, plyometrics are simple. Possibly too simple, which would explain the fact that they've been over complicated, in order to make it look like a "real" workout. However, before we even start talking about HOW, let's talk about some ground rules:
If you aren't regularly climbing at least mid-5.12 or V6, you don't need to do plyometrics, so DON'T.
More than 4-8 reps of each exercise per session, for 2 sessions per week, is TOO MUCH.
QUALITY over quantity. If you're tired, don't risk it.
Rest a minimum of 1-2 minutes between reps, preferably more.
You need to be 100% for each attempt. DO NOT do this to get tired.
Now that we've got that worked out, we can move on. If you're in doubt, refer back to the above list.
What Are Plyometrics?
Originally developed by Soviet scientist Yuri Verkoshansky, plyometrics have often been called "jump training", which is something of a mislabel. Contrary to what you might find in a quick internet search, plyometrics are not just jumping.
Single Box Jumps are not plyometric.
Campus 1-5-9 is not plyometric.
While both of these things are expressions of power, plyometrics and power are not absolutely synonymous.
To put it as short and as basic as I can, plyometrics is a powerful movement consisting of three phases, so let's look at each of those phases and how they relate to campusing:
Eccentric (Landing or Preloading) Phase:
In this phase, the climber drops from a higher rung to a lower rung. Upon contacting the lower rung, elastic energy is created and stored in the prime mover (agonist) muscles. The distance dropped during this phase is important, and that distance will affect the length of the following Amortization phase.Amortization (Transition) Phase:
This is the phase between the Landing and Take-Off. It begins when you contact the lower rung, continues through the absorption of the force caused by dropping, and ends when you begin moving upward again. Keeping this phase as short as possible is crucial for power development. If the transition phase takes too long, the stored energy dissipates, and the plyometric effect is lost, making the exercise simply an explosive pullup. Essentially, if there is a pause in the movement, you're losing benefits.Concentric (Take-Off) Phase:
This phase is all about exploding upward out of the bottom of the Transition phase, utilizing the stored elastic energy. This phase is often called plyometrics on its own, but it most definitely isn't - that would be skipping 2/3 of the entire movement. During this phase, many climbers aim to latch a higher rung, and while it isn't necessary, because the goal is simply to explode upward as high as possible, many people will find it easier to have something to aim for.
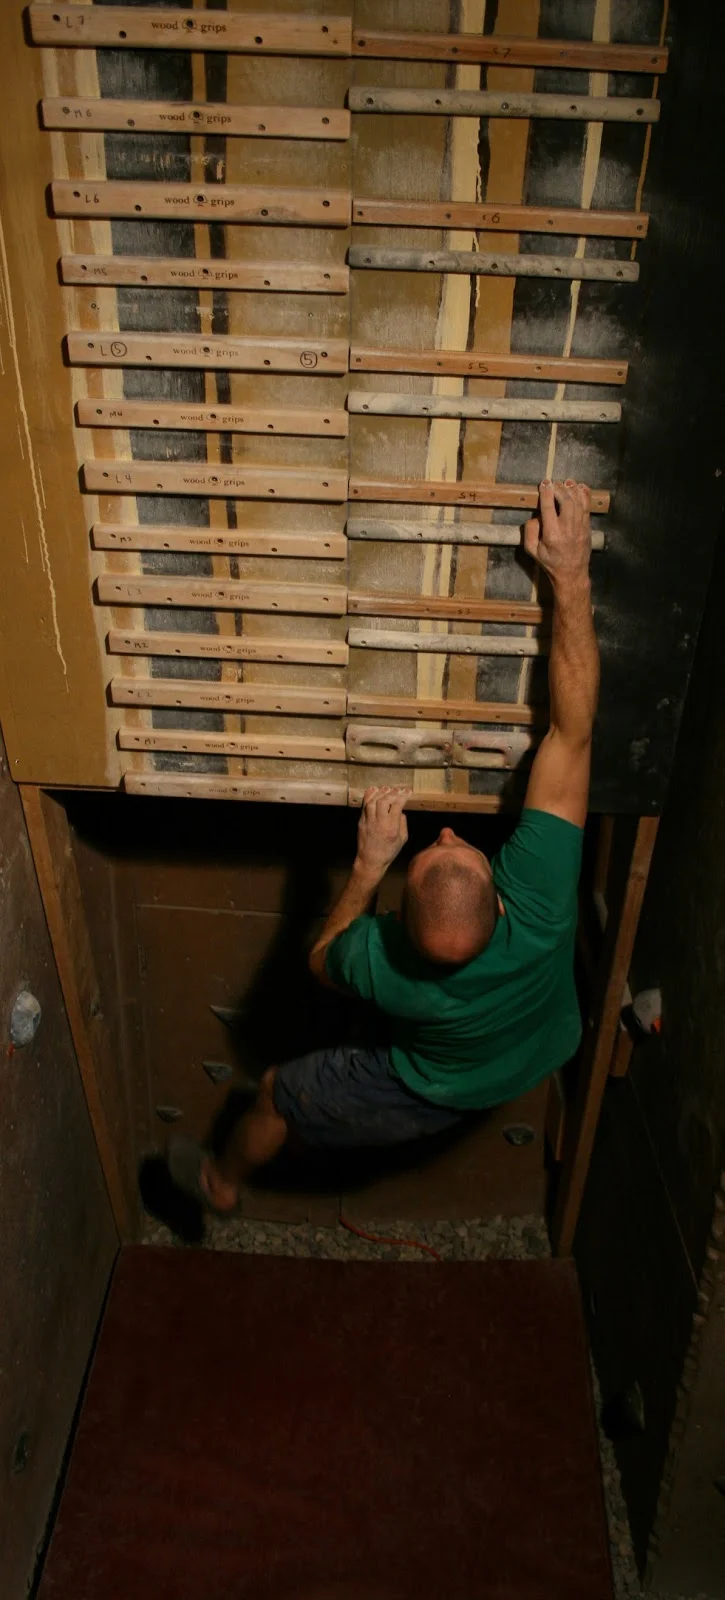
Campus Doubles.
The classic campus exercise for plyometric work, Campus Doubles are extremely misunderstood. Most often, campus doubles are done one of two ways: Either the climber simply goes simultaneously with both hands, from rung to rung, up the campus board, or they go from 1-3, then drops to 2, then explodes to 4, then drops back to 3, then explodes to 5, and so on until they fail. Method #1 isn't bad per se, but it isn't plyometric. It's an excellent power, timing, and coordination exercise, but that isn't what we're looking for here. Method #2 is better, in that it involves a true plyometric effect, but by the second or third rep, the effect is being greatly diminished due to either fatigue or lack of sufficient loading. Put simply, if you can easily do Method #2 for 4 or 5 reps in a row, then it's too easy for you, and you should be focusing instead on progressing by increasing the distance of your drop, shortening your transition phase, and increasing how high you can go in the concentric phase. Progressing with more reps just means that your individual reps are easier for you. There is also little reason to progress to smaller rungs, as your muscle fibers and nervous system don't care how big the edge is; they get the same response regardless. Moving to smaller edges puts an unnecessary amount of force onto your fingers, risking injury, and getting injured while training is an absolute fail.
How Do I Determine How Far To Drop?
Herein lies the crux. Nearly all of the extensive studies have been done utilizing depth jumps, so true plyometric campus data is slim, and I don't have the slightest idea (or desire) how to go about a study myself. However, even in depth jumps, the height will always depend on the ability of the athlete. In my opinion, here is what it boils down to:
Start small.
By starting small, you can focus on making sure that the transition phase remains as short as possible. There is an obvious point when it becomes ridiculous to try to shorten the transition phase. When you find that place, you can begin to try lengthening your drop. If lengthening the drop greatly reduces your concentric (take-off) phase, then you've likely gone too far, and should dial it back a bit before moving on. This is a three part movement, and all of the parts should be working together to produce the best possible entire plyometric, so don't focus on one phase at the expense of the others.
Transitioning.
The transition phase should be kept as short as possible, but like I mentioned above, there comes a point where it just doesn't make sense to try and make it shorter. Do I have an exact number? No. All I can say is that if you begin to feel out of control, slow down a little. It's important that you absorb the force, as this is how energy is stored to begin with. At the bottom of that absorption motion, you should immediately begin the next phase, with no pause.
Take-Off.
Of utmost importance here is going as high as you can, while remaining in control. I often instruct athletes NOT to latch a higher rung, but to tap as high as they can on the board. Some athletes have a hard time with this concept, and there is no great danger in latching a rung that is within easy reach, so I initially will allow it. However, progress is often a matter of centimeters, and always aiming for something at the same height can quickly stall progress. Additionally, as athletes begin to try and latch rungs at the absolute limits of their reach, they do so by releasing the engagement on their shoulders and crashing down onto them - greatly increasing the risk of shoulder injury. Ideally, a measuring system of some sort would be available on every campus board, but this is rarely the case, (I plan to do it on my next board). It's nice to have 1/2 distance rungs for plyometric campusing, and as long as you continue to follow the principle of progressive overload, and aim higher when you've mastered a specific height, you'll be good to go.
It doesn't end here, of course. There are many variations one could employ as they progress. Besides increasing the distance of the drop and the height of the explosion, experienced athletes could incorporate staggered plyometrics, starting with hands on staggered rungs (or a single rung), and dropping into a staggered position, so that they are required to transition and take-off with a staggered stance, possibly (this is all theory) even more specific to climbing movement. Or if you aren't quite ready for Campus Doubles, but want to get in on the action, you still have another option: Plyo Touches.
Plyo Touches.
The simplest of the true plyometric campus exercises, Plyo Touches are a great primer to build up to doing the more difficult Campus Doubles. To perform a Plyo Touch, start with hands staggered, one hand on a higher rung. Remaining in control, drop the high hand to the same rung as the low hand, absorb the force, and immediately explode as high as you can with the moving hand. Repeat the exercise with the opposite hand.
Before you add Plyometrics to your workout, remember, Power is the speed at which you can apply Strength. There is no Power without Strength. Get strong first. Then gain power. It can't work the other way around.


From coach Nate Drolet and Tension Climbing, the obvious next progression in campus training is here.