
ATTACKtics: Projecting, Part II: The Approach
You've picked your project, and now find yourself standing beneath it with a fistful of quickdraws unsure of what on earth to do next.
If you're like many people approaching their first "hard" route, you'll tie in, give it 100%, fall all over the place, maybe not even get to the top, and leave dejected. Next trip, you'll come nowhere near that route, sticking instead to the grades you feel comfortable on.
Lets go ahead and cut that off.
Instead, if you exercise a little patience, along with a few tricks and the right tactics, projecting something hard can be a rewarding process.
Lets take it step by step...
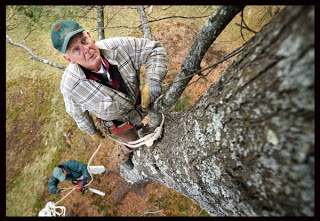
Step 1: Sussing.
Hang when you can. This guy knows.
You aren't trying to send. This is a project, remember? Plan on, at the very least, going bolt-to-bolt. Resist the urge to climb through multi-bolt moderate sections on your first attempt, instead stopping at each bolt, lowering back down and being completely sure that you're being as efficient as possible. It's worth your time to try every possible sequence, and decide which is best for you. The "official" beta isn't always the best way for everyone. When you reach a crux section or hard-to-hang draw, don't be afraid to employ the stickclip. There's no award for spending a bunch of extra energy taking a fall over and over when you're going bolt-to-bolt. Stickclip it and toprope it. It's entirely possible that you might not do all the moves or make all the clips on your first time up the route, and that's absolutely ok. Don't fret. The goal here isn't to burn through all your skin, energy, and psyche, but to get to the top, get the gist of the climbing, and start to form a plan of attack. After a few goes of bolt-to-bolting, you should start to feel a little more comfortable with what you're embarking on.
Step 2: The Pieces.

Examine the pieces.
If there are moves you haven't done or clips you haven't made, focus on those. You can make some small, easier links in the process of going up the route to try the hard moves, but be careful not to get too worked.
Save your power for learning the hardest moves by continuing to go bolt-to-bolt, or even a couple of bolts at a time, if you feel the need. I might even still employ the stickclip well into this phase of the project if there is a particularly heady, difficult, or complex section that I can more efficiently work out on toprope. Learn the clipping stances and the rest stances. Depending upon how difficult for you this project is, this phase can last anywhere from one or two goes, to multiple weeks of work. Take as long as you need.
Step 2.5:
Occasionally a project will have a move or sequence that you can understand... you can see exactly how to do it... you just haven't connected yet. Use your energy early in the session to work on this section, moving on to Step 3 after you feel that your power is draining and you're no longer able to give 100% there. If the move is extremely low percentage, you may only stick it a time or two, and it's not a bad idea to have the rest of the route send-ready.
Step 3: Linkage.
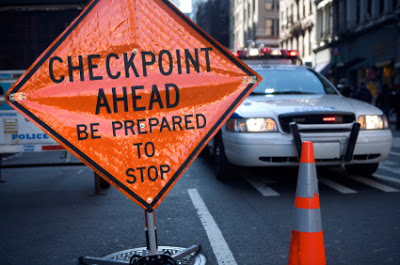
All the moves are done, and it's time to start making the obvious smart links. By "smart links", I mean that you won't always just see how high you can get from the ground, then see how high you get before falling again. Instead, you should step back and break the route down into parts. Is there an obvious rest somewhere? A good hold separating cruxes? Anything that breaks the route, including just a crux in the middle of an extremely sustained section, can be considered a checkpoint. If you know you're in for the long haul, go for the obviously easy links first. If you plan on making short work of this one, skip straight to the hardest links and save the easy ones for when you're a little worked. Ground to Checkpoint 1. Now say "Take", go in direct to the bolt, and hang out for a while. When you feel ready, proceed to Checkpoint 2. Keep in mind that Checkpoint 1 doesn't need to be halfway up the route. It could be at the 2nd bolt if there is an obvious reason to stop there. Also, don't forget that the beginning and end of the crux are essentially checkpoints. You may not be able to link through the crux just yet, so break it into even smaller sections. Quickly work through the obvious "smart links" that you can, over the course of a few goes, really working out the efficiency in those easier sections, and move on to Step 4.
Step 4: Next Post!
You've made all the obvious links and you have the easier sections fairly dialed in, and you're ready to either start redpoint go's (if it's a short-term project), or really dig in to working the route (if it's a long-term project). If you're ready for redpoint attempts, remove the word "take" from your vocabulary, tie in, step on, and see how it goes. We'll talk more about smart and efficient tactics for working a long or mid-term project in the Part III post. In Part IV, we'll move on to redpoint attempts.


You've made the tough decision to commit. Now, to help you break this thing down to an inevitable send.